When Mike and I unpacked all of our possessions almost a year ago, I came across some items that were meant for crafts. As the months passed by, I finally had a couple nights to myself, so I brought out the paints!
First, I looked at Pinterest to point me in a direction of awesomeness. I had two unused, plain wooden mirrors in front of me that needed some love.
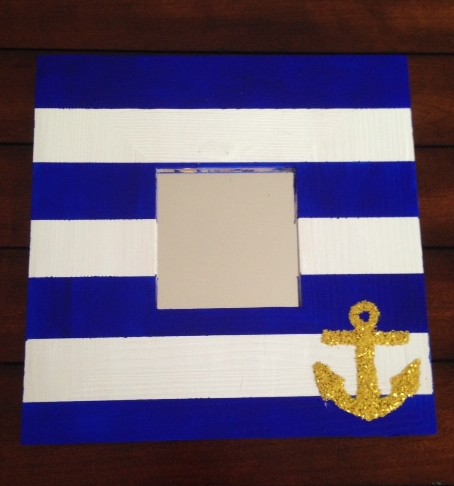
The only place for the mirrors were in our “powder room,” which has a beach theme. So, I decided the color must be blue. (Now, in hindsight, it was probably too matchy-matchy…)
So, I poured a glass of wine and let the creativity flow.
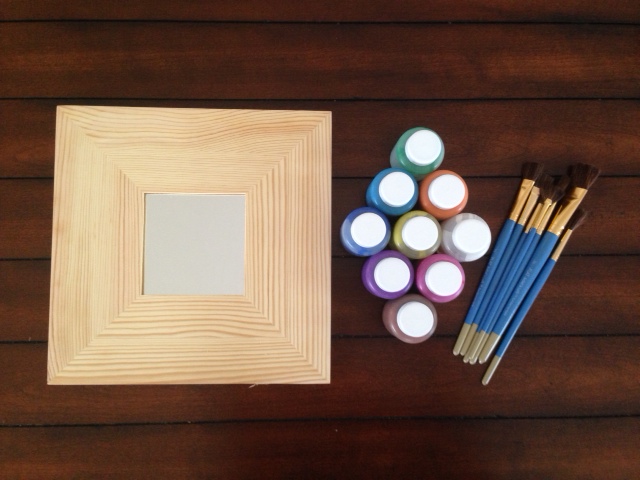
Supplies:
- Mirror(s)
- Newspaper
- Paint
- Tape (optional)
- Paint Brushes
- Paper Plate
Directions:
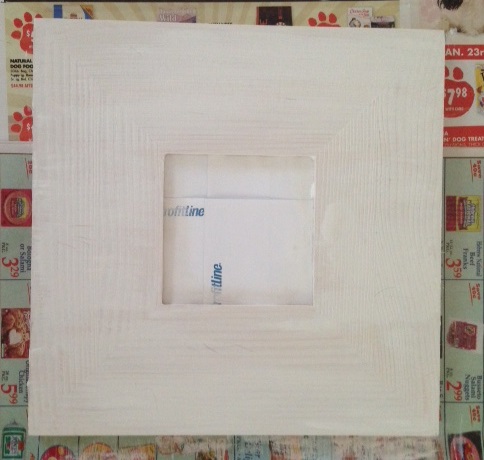
Lay down newspaper, with mirror on top. I used a mirror with a wooden frame, and it didn’t need to be cleaned because it was wrapped in plastic. However, if you bought one from the thrift store and/or is of a different material, be sure to wipe it clean.
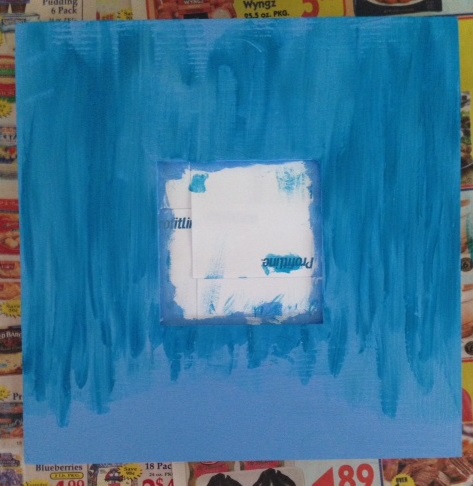
After mirrors are dry, pick a design you like. For one mirror I chose stripes, so I did a base coat of the lighter color, white. Allow time to dry. While the other mirror I decided to do a faded blue. Again, painting a base layer of the lighter color, light blue.
The faded blue was a little difficult because it was constantly layering the darker colors, and I was never happy with the outcome. Plus, you need to allow some time to dry to add more colors, but not too much, as you want them to blend.
The stripes were something I haven’t tried before. (I usually don’t trust painters tape, because I always think the paint will seep through, and that doesn’t make me a happy camper). Anyways, I gave it a go. Added about 2-3 layers of the blue to make it darker and to make sure there weren’t any weird streaks.
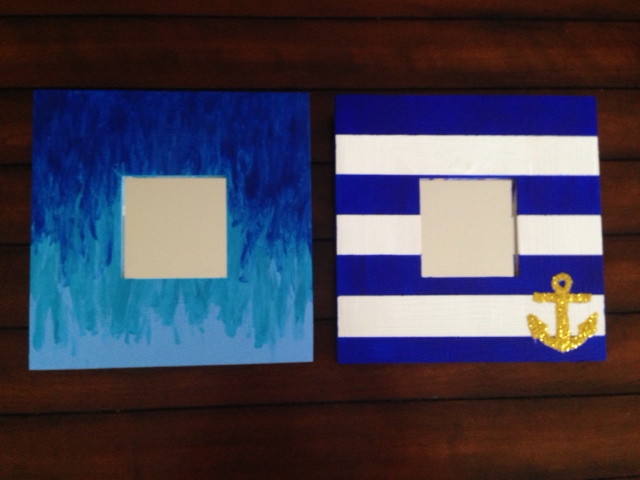
I allowed a few hours to dry before removing tape. At that point, I decided that the striped mirror needed some flare and so I added some glue in the shape of an anchor and poured glitter on it! Allowed drying time overnight, and hung the next day.
Note: if you are painting on wood, remember to paint with the grain, not against it, as this will create weird splotches/streaks.

2 Comments
This is definitely one of my favorite crafts you’ve created so far. It’s possible the anchor has something to do with it… 🙂 Love your instruction too on creating the frame, design, the whole enchilada. You make it look so easy. Love your work… it’s awesome, you’re awesome!
Thank you so much! The anchor definitely provides a great nautical theme!